The Free Mixbook Mobile App
Wouldn’t it be super convenient to build your photo projects as you experience them? Or maybe you’re running out of storage on vacation and need to move your photos somewhere. The free Mixbook mobile app is the perfect companion for memory keeping on the go.
On Your Mobile Device? Click Below to Download in the Apple App Store for Free!
On Your Computer? Scan the QR Code Below to Download the App!
* Currently available for iOS devices only
The Mixbook Mobile App
This instructional blog will help you navigate all the great things you can accomplish with the Mixbook mobile app.
How to Upload Photos
The Mixbook mobile app allows you to upload photos in three different ways:
How to Upload Photos Directly into an Existing or New Project
To upload your favorite moments into a photo project all on your device on the go, you’ll either need to start a new project or have an existing project in your My Projects tab.
When Creating a New Project
Start by selecting the Home tab to begin choosing your photo project.
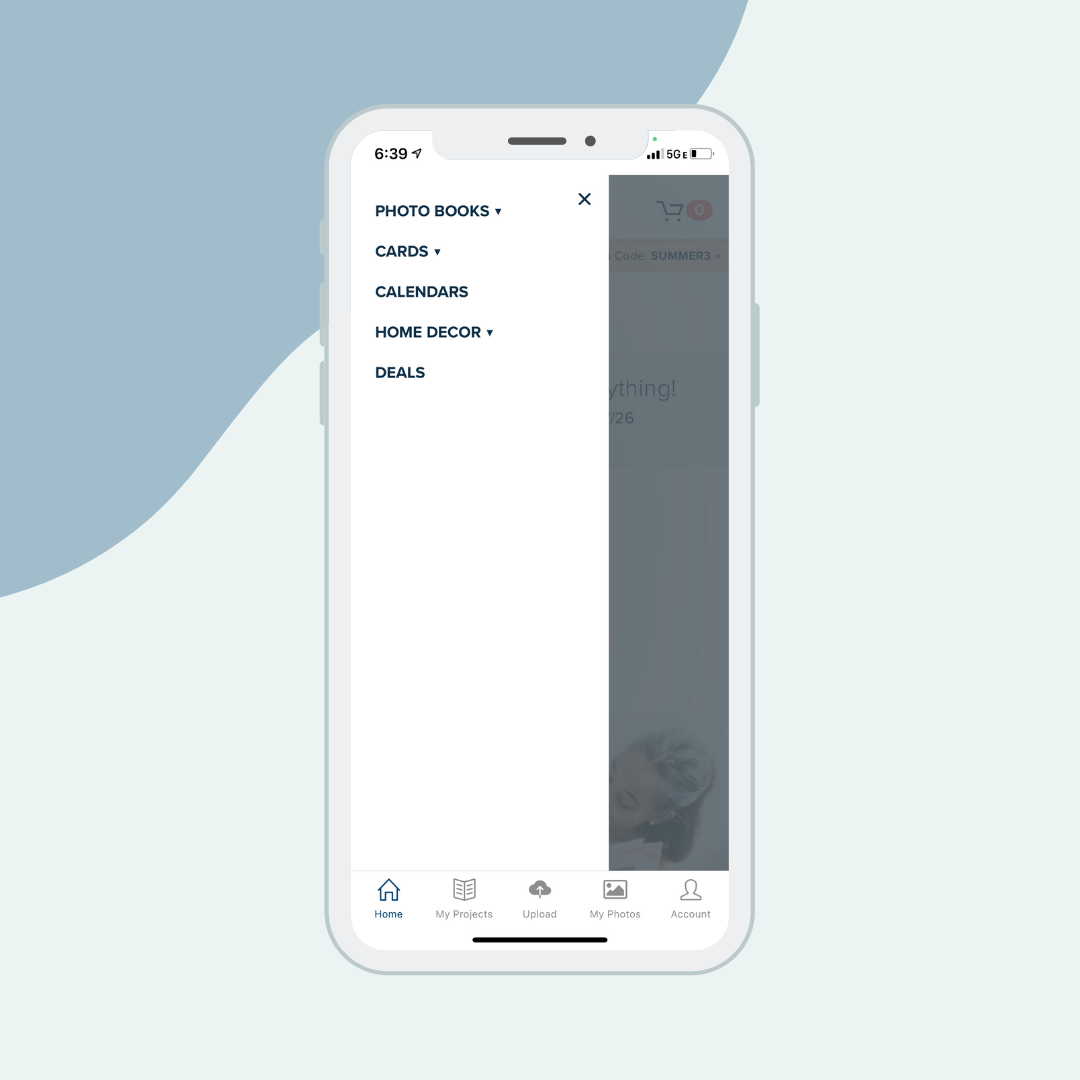
From the homepage of Mixbook, you can navigate to the top left menu (the three horizontal lines) to select your product.
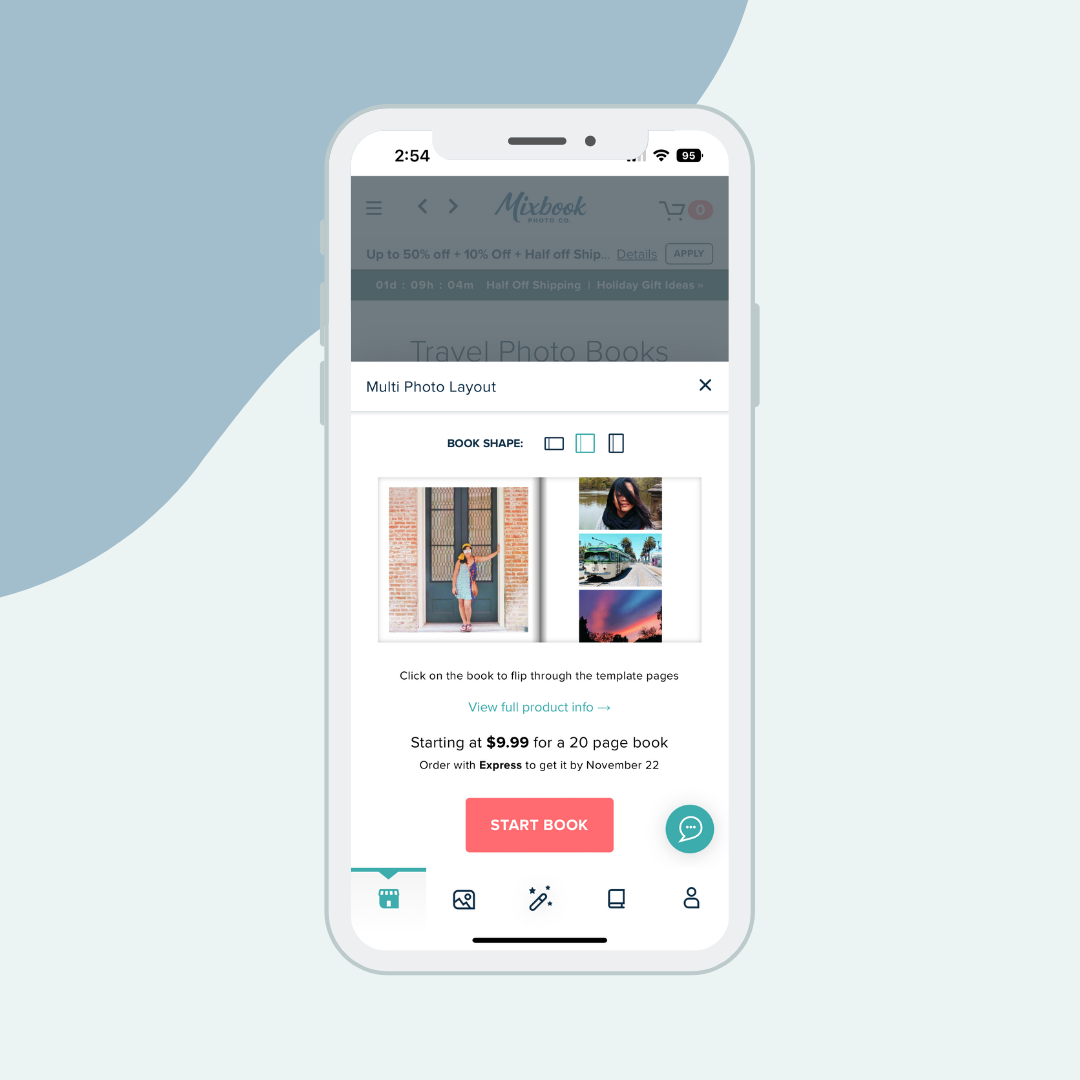
You’ll see all our available products and if you click them, more options will appear. Once you select your product/theme, click Start.
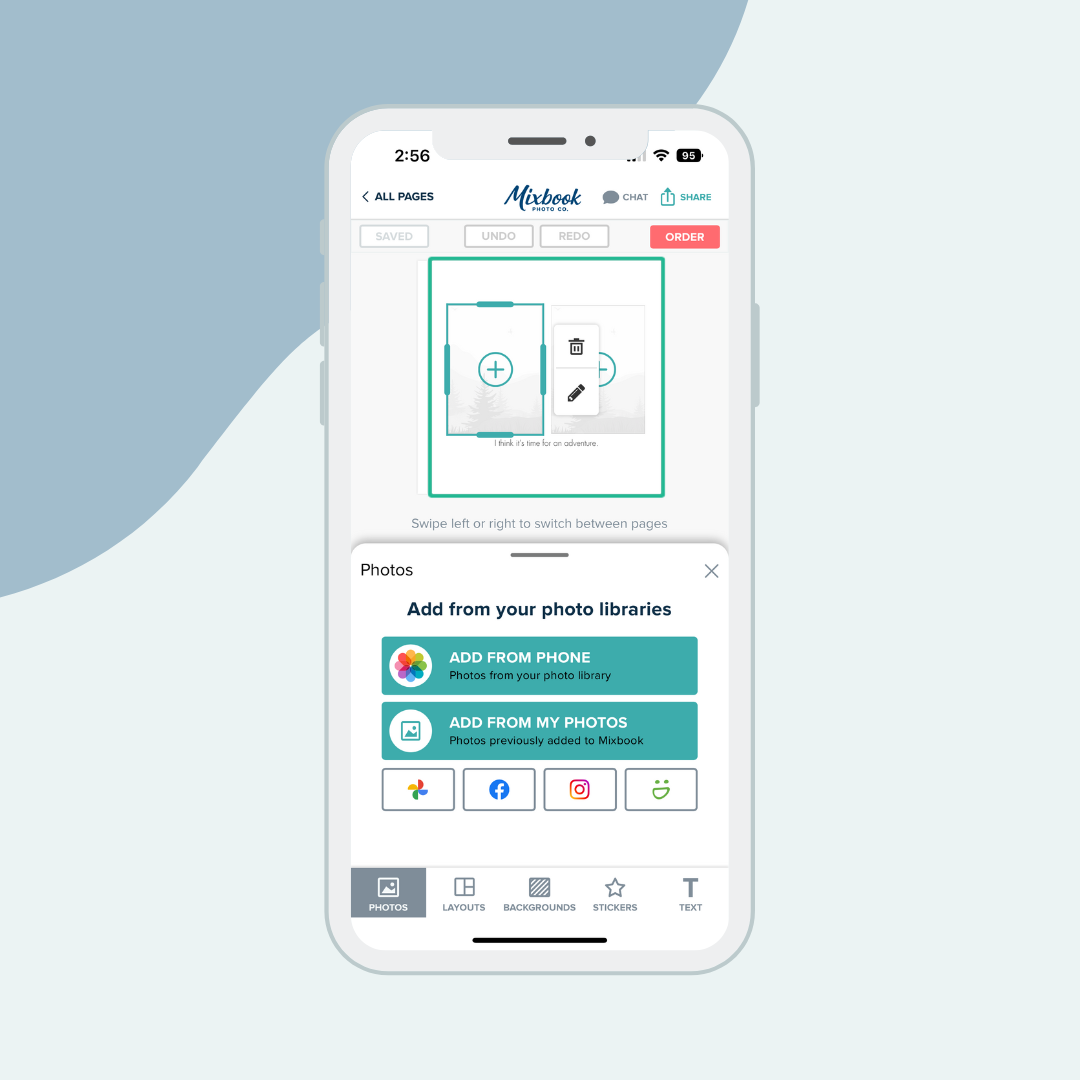
The Mixbook Editor will launch. Click Photos in the lower left to upload your photos.
Select Upload Photos to pick images from your mobile device.
Once you’ve uploaded your photos, they’ll be waiting for you to place when you’re ready to create your project. It’s that easy!
Upload to an Existing Project
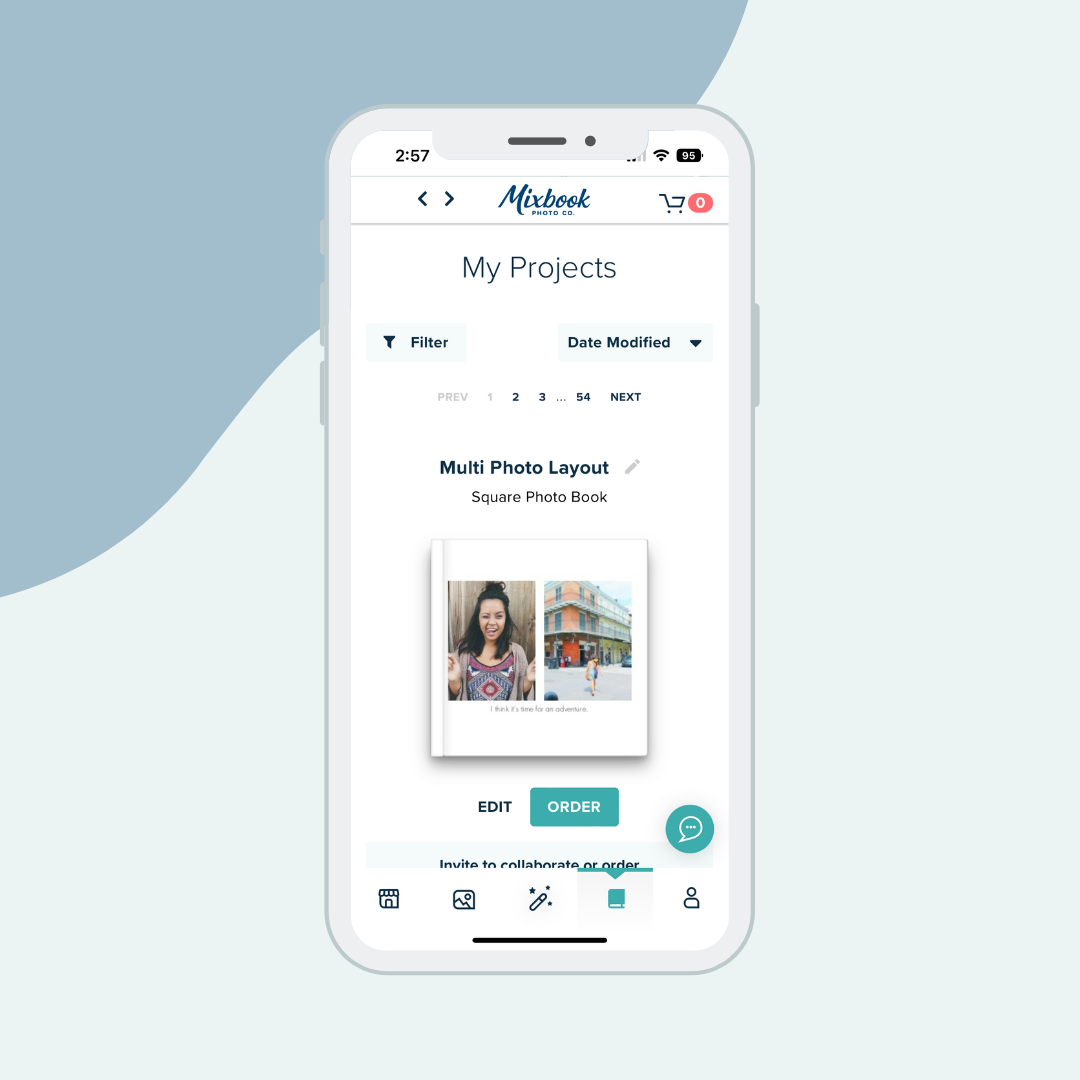
If you already have an existing project that you’d like to upload to, just click the My Projects tab.
Scroll until you find the project, and click Edit to open the Editor.
To upload your photos, just follow the instructions we previously mentioned.
How to Upload Photos Directly into an Existing Project From Your Phone When You’re Editing on Desktop Devices (Mobile + Desktop)
This second way is for those who are creating/editing their project on a desktop computer and you’d like to import photos from your phone.
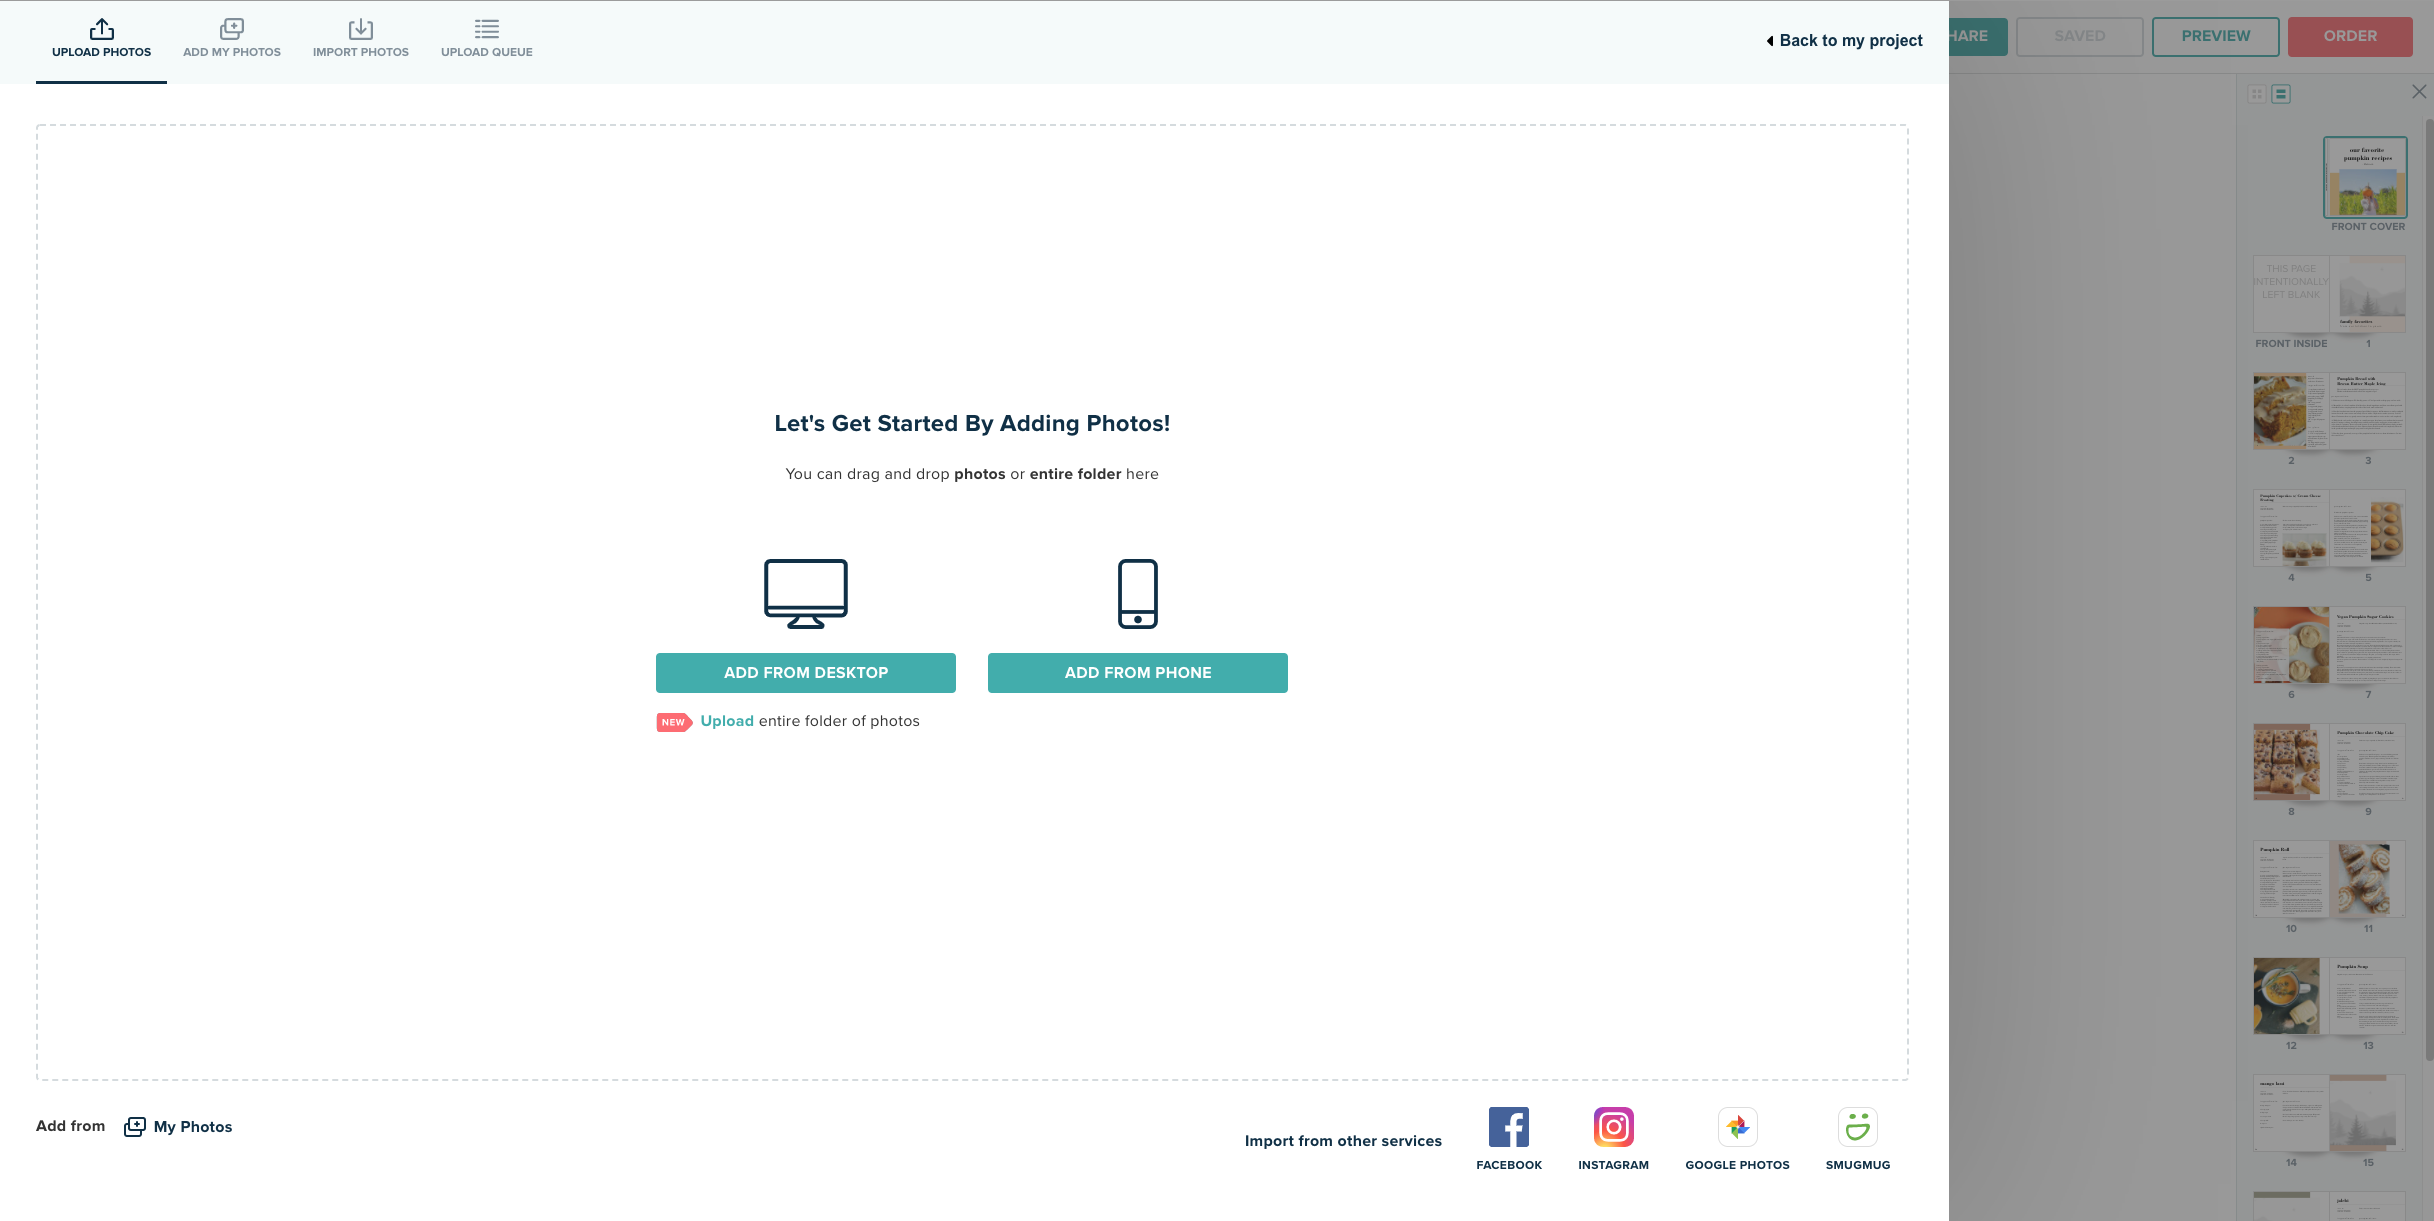
Open your project in the desktop editor and select Add Photos > Add from Phone > Scan QR Code.
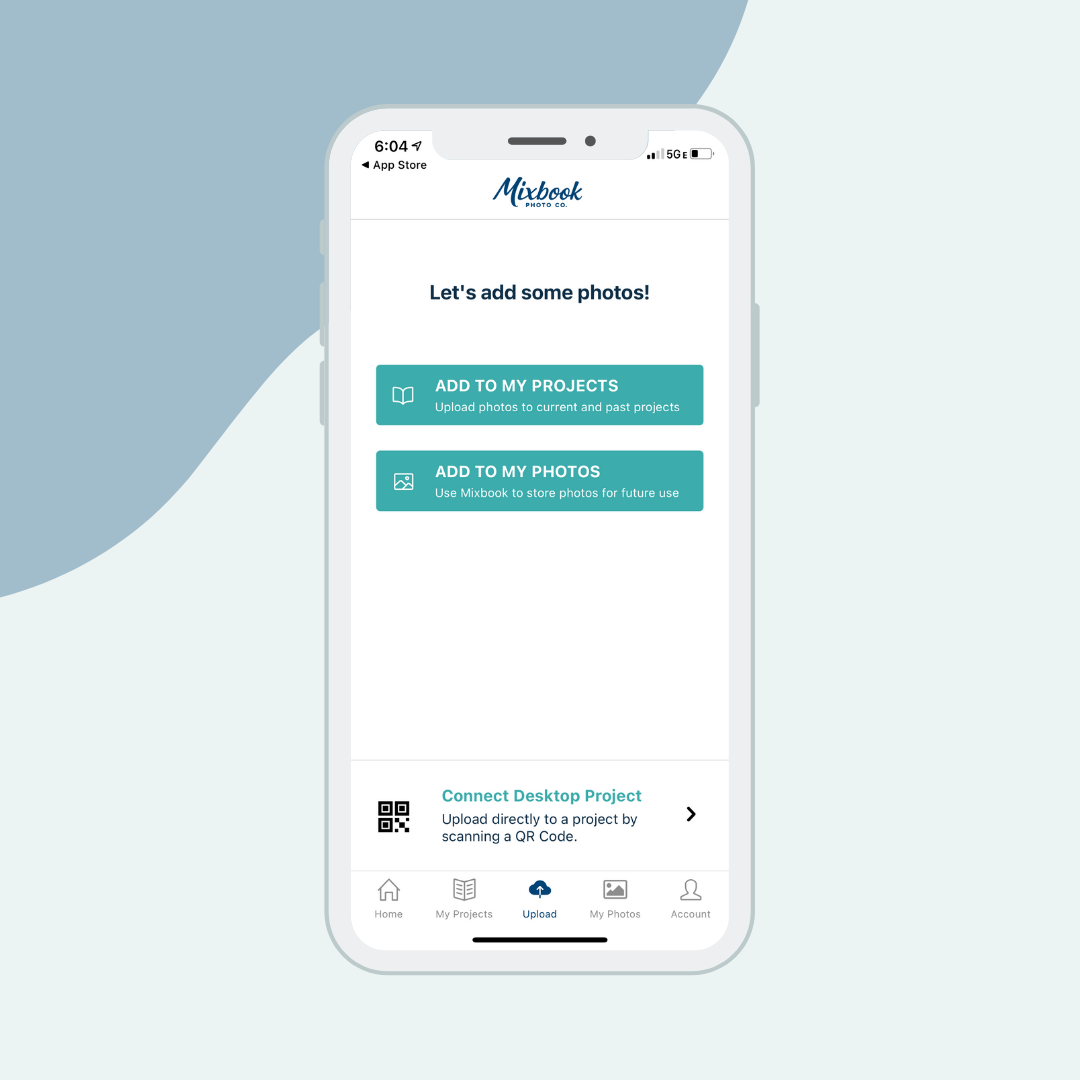
Once the QR code is generated on your desktop screen, click the Connect Desktop Project button on the mobile app’s upload screen to open the QR code scanner. Hold your phone over the QR code generated on your desktop to scan.
Upon successfully scanning the QR code you’ll see your project on your mobile device:
Click the coral button that reads Upload Photos and allow permissions to access your camera roll.
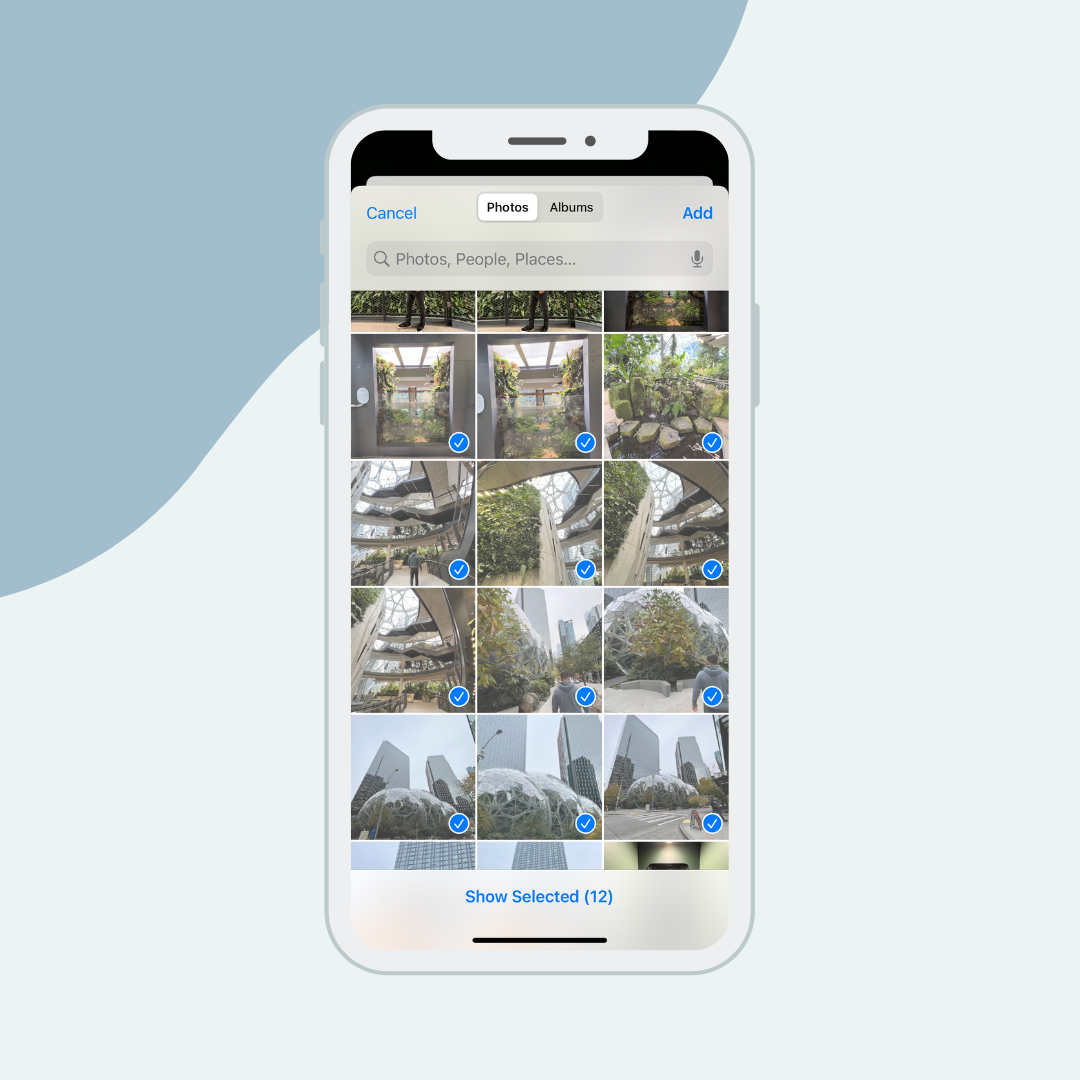
Now select the photos you’d like to upload to your project. Click Add at the top right when you’ve selected your photos.
Once your photos successfully upload to your project, you’ll see this confirmation screen. From here you can either click Done or Add More Photos. Refresh your desktop to see your photos available in your photo tray.
How to Upload Photos to My Photos to Use in a Project at a Later Date All on Mobile (2 Ways)
When you’re on the go and want to get a head-start on future projects, you can upload photos to My Photos to access them after your vacations or special events. Your photos will be uploaded and waiting for you to turn them into photo projects.
1st Way
Click the My Photos tab at the bottom and then Upload Photos in green at the top of the screen.
Choose Add to My Photos and select your photos and click Done at the top right.
You can sort your photo library by Date Added (Newest) to see your new photos safe and sound.
2nd Way
Alternatively, you may also upload to My Photos by tapping the Upload tab and selecting “Upload to My Photos”. Just follow the same steps as mentioned before.
How to Create or Edit Existing Projects
If you’re looking to create or edit projects on your app, you’ll be able to customize and order projects.
How to Create New Projects
From the Home tab and homepage of Mixbook, you can navigate to the top left menu (the three horizontal lines) to select your product.
Choose your photo project from our available products. Each will have further options to select the exact type or theme you’re looking for. Once you select a theme, click Start!
To learn how to use our mobile editor, read our how to article for a deeper dive.
How to Edit an Existing Project
To edit a current project, instead of the Home tab, navigate to the My Projects tab and select the project and click Edit to open the editor.
Access My Photos on the App
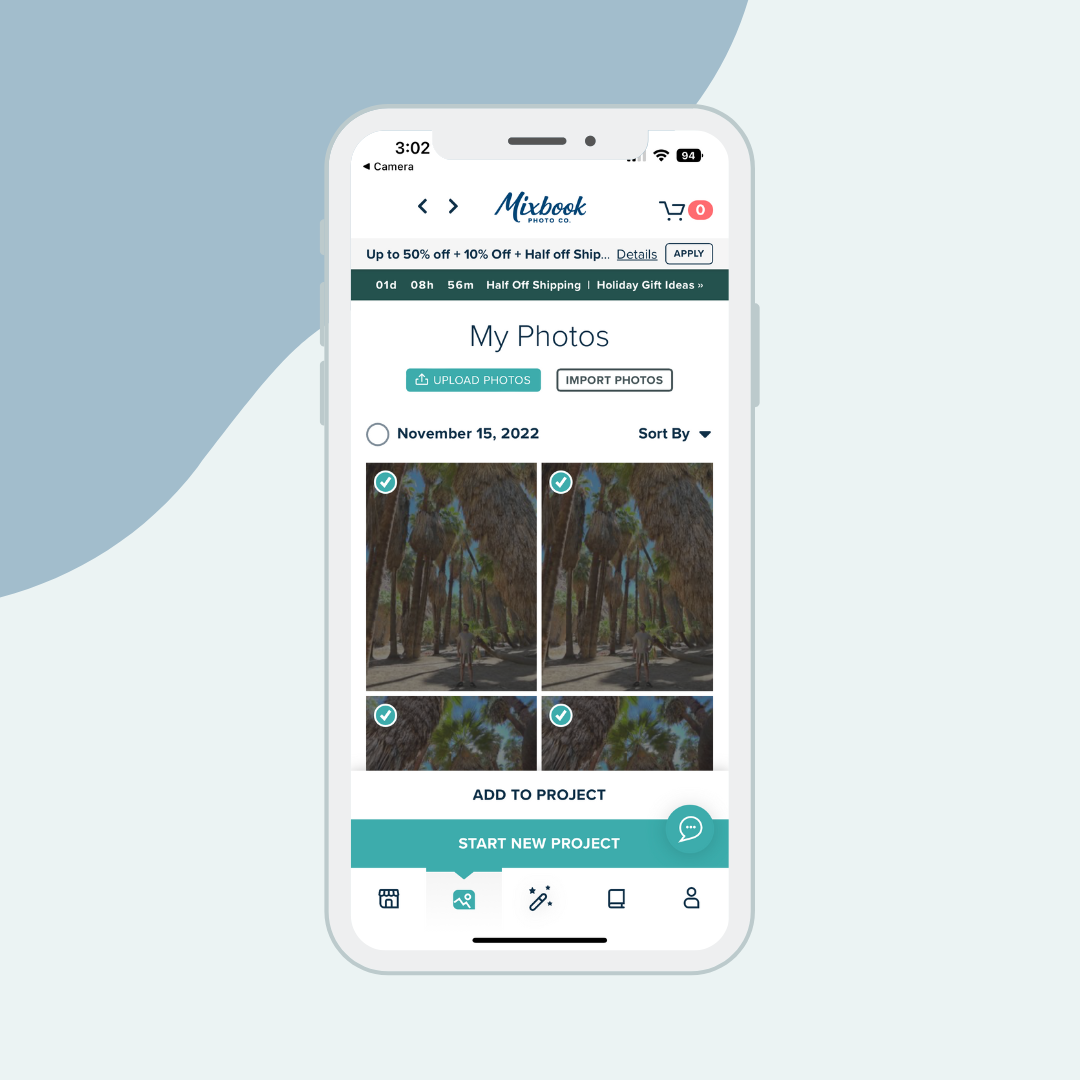
If you’d like to start projects or upload photos from your existing photos, click the My Photos tab.
From here you can either upload photos to My Photos to use at another time or start a project using selected photos.
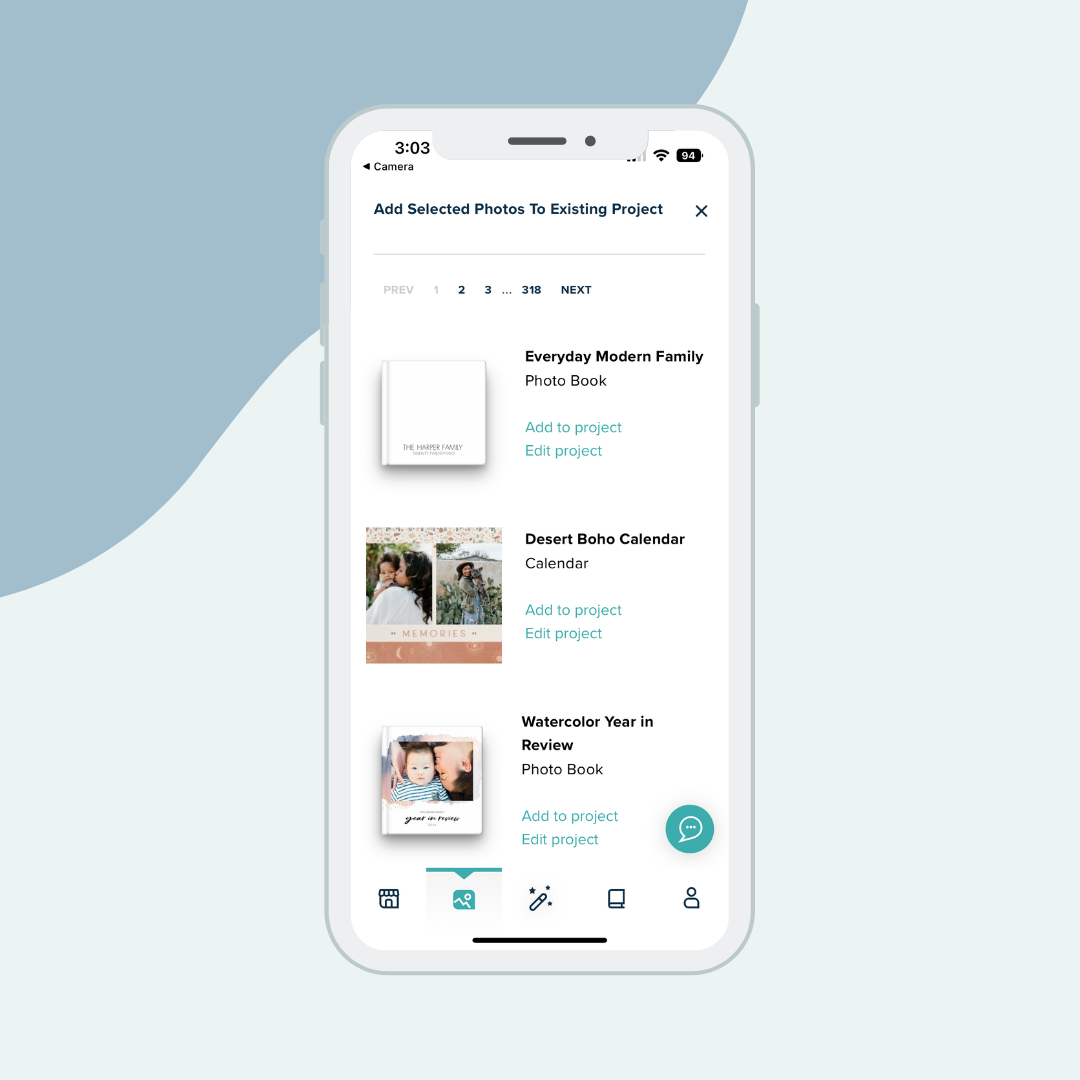
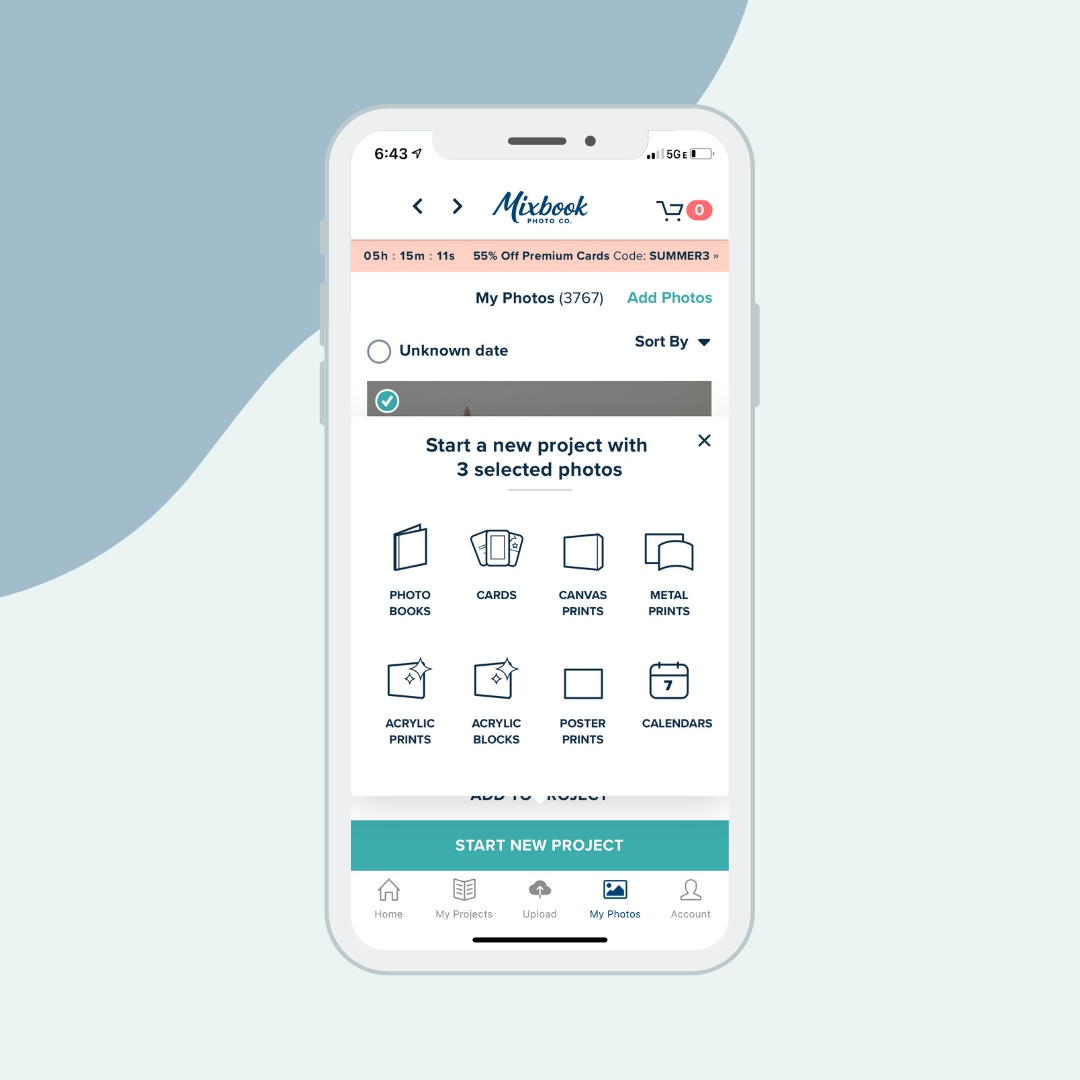
Once you select photos, you’ll see two options appear at the bottom: Add to Project and Start New Project
When you select Add to Project, you’ll be taken to your existing projects. Just click Add to Project to the left of your chosen project.
When you select Start New Project you’ll be given the option of which product. For example, if you select Photo Books, you’ll then be taken to our photo book themes to chose the theme you'd like to upload to.
How to Access Your Account Settings
You can access your account settings through the Mixbook app as well. These are the same settings available to you on our desktop site.
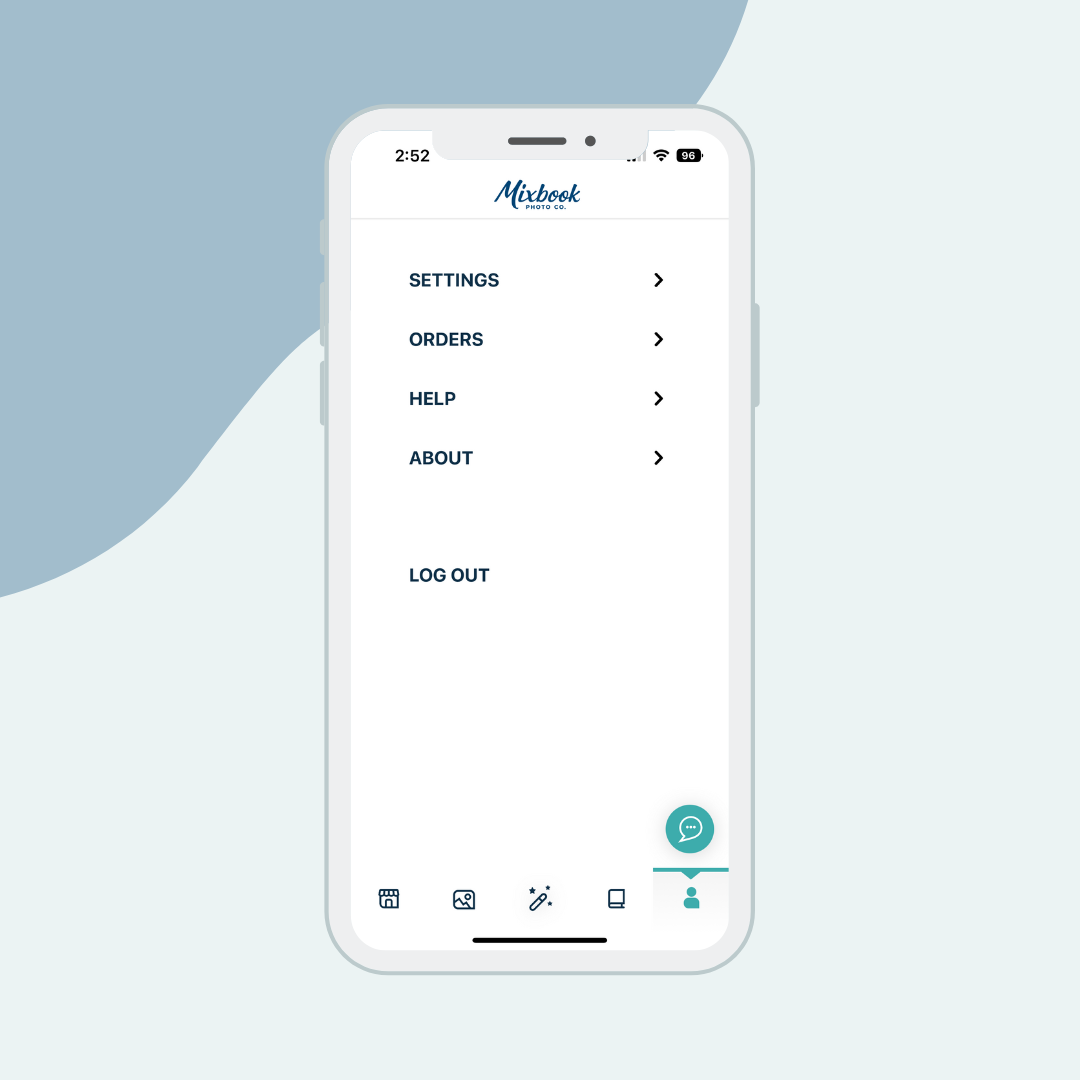
Click the Account tab.
You’ll see all your account settings located under this tab. You can update account settings, track orders, access our help page or log out.
What will you create with the Mixbook app?
We hope you love using the Mixbook app on the go for all your custom photo projects. Upload photos on the go, create projects from wherever you are, and manage all your projects in your pocket. Scan the Qr code below to download now!
Click Below to Download (on your mobile device) Or Scan the QR Code if You’re on a Desktop Computer


