Welcome to the third installment of our “Most Common Errors” series. This entry will discuss color saturation, which deals directly with the colors in your photo. An increase in saturation will make the photo appear warmer, increasing the red and orange tones in your photo. Decreasing the saturation will cool the photo, moving the colors closer to the gray scale. To better understand saturation, let’s take a look at some examples.
Here is a photo of some pink roses.
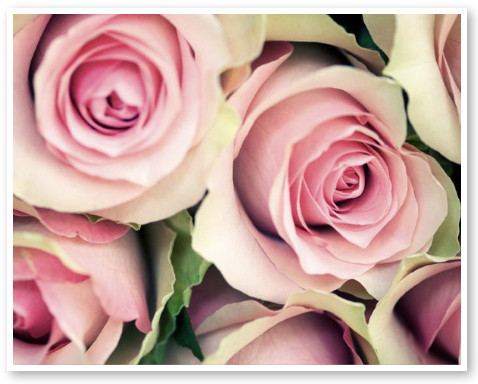 While a beautiful photo, the roses are a little washed out. To get more color out of the photo, we can increase the saturation to produce the following photo:
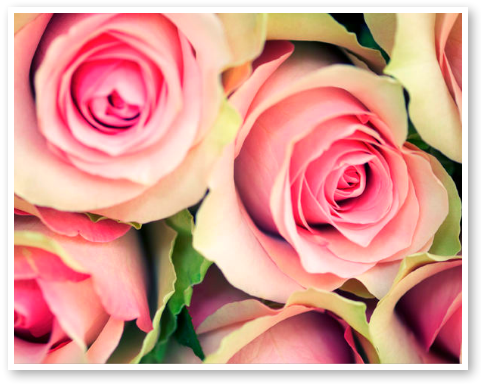
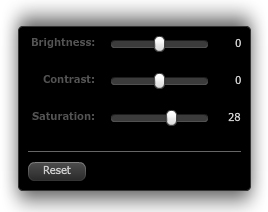
The pinks are more vivid with an increase in saturation! To achieve this, click on your photo in the Mixbook editor, then click on the Photo Adjustment button:  From there, move the slider labeled "Saturation" to the right. This will warm up the photo and give the flowers a more vibrant color.
*Please note, be very careful when increasing the saturation of photos containing people. Remember, saturation increases the red and orange tones in the skin, which can cause the person to look sunburned - or worse, as if the spray tan booth attacked them!
Now, let’s take a look at our next example. This photo was taken on a very sunny day, after the kids had been swimming for a while. As you can see, they’re a little flushed! This can become a problem when the photo goes to print, the photo coming out even warmer than how you see it on your screen. So how can we fix this? Easy! Again, using the Photo Adjustment tool, move the slider labeled "Saturation" to the left. This will cool the photo and prevent your children from looking like tomatoes!
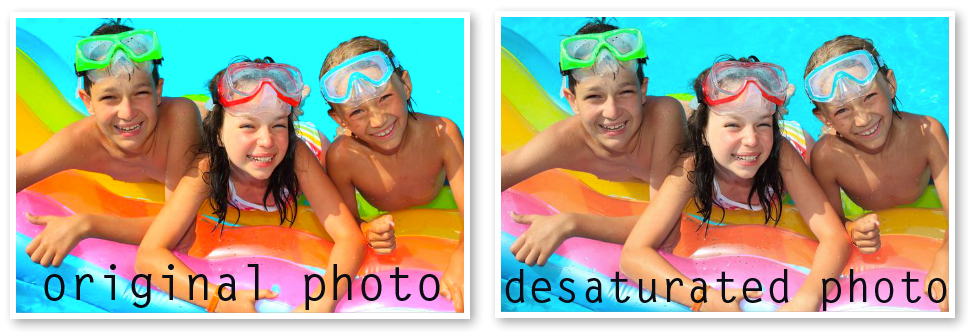
**Insider Tip: The summer sun tends to warm up your photos! To prevent looking overly tan (similar to an Oompa Loompa) or sunburned (you don't really want to look like a tomato, do you?), make sure you pay attention to the saturation. Keep in mind, having red and orange colored items in the photo will also cause the photo to appear warmer. If you're ever unsure, do not hesitate to contact us! We will be more than happy to take a look and help make sure your photos print out beautifully!
To learn more about the Photo Adjustment feature, take a look at our Mixbook 101 entry. We’ll see you next time, with more tips on to create the best photo book possible!

