Creating a photography portfolio: 8 steps to success with Mixbook
By Dorothy Bond
"Photographers who want to show their work in galleries, go to art school, or attract new clients need a professional portfolio. It’s the easiest way for them to demonstrate their skills and their interest areas.
I've taken thousands of travel photos over the last 20 years. I knew I needed to put them in a portfolio — but I didn't want to invest in a batch of books from a professional printer That's why I decided to create my portfolio with the help of Mixbook Studio.
What type of portfolio should you make?
I knew I wanted to create a photography portfolio, but I needed to choose a format before I could start working. There are four primary options for creating a professional portfolio:
Buy an old-fashioned portfolio binder with plastic sheets that hold prints
Order a portfolio from a traditional printing company
Create a custom portfolio with Mixbook
Build a website that acts as an online portfolio
A personalized portfolio was the best choice for my needs. I knew that I could use my graphic design skills to tell a story in my photo book. Ordering from Mixbook made better sense for my budget too.
The type of portfolio you choose depends on your preferences and needs. It's okay to use multiple types of portfolios too. For example, I plan to create a digital portfolio to complement my custom book. Digital portfolios are easy to show to clients in remote locations and are easy to update.
Step one: Choosing portfolio photos
I've been taking photos for a long time, so I have thousands of shots stored on my computer. I knew I needed to trim down my selections because quality is more important than quantity when it comes to a portfolio.
I started my selection process by setting a theme. I decided to do a travel photography book because I knew it would allow me to include
Landscapes
Architectural shots
Portraiture
Nature photos
After I picked out my photos, I uploaded them to Mixbook directly from my computer. It took only a few clicks thanks to the option to add an entire folder of photos to a project.
Step two: Picking out my Mixbook theme
The point of a photography portfolio is to highlight photos — which meant that I needed to pick the right photo book theme. I started by browsing the PRO Collection but didn't see what I wanted there. I decided to look at travel photo books instead since they related to my portfolio's theme.
I ultimately chose the Photography Journey theme because I loved the full-page photo spreads and space for quotes. I knew it would be easy to switch out the quotes and adapt the theme to my needs in Mixbook Studio.
Step three: Making magic with AutoCreate
I'm a working mom who homeschools two kids. While I'm passionate about design, I knew I couldn't spend hours and hours making my photography portfolio. That's why I used Mixbook Studio's AutoCreate feature.
All I had to do was click AutoCreate one time in the editing pane for my project. A few minutes later, my photo book was populated with pictures. I was impressed by how well Mixbook Studio matched photos on pages according to the place that they were taken — all of my Egypt shots appeared in one section, while photos from Istanbul and Nicaragua appeared in their own sequence of pages.
Step four: Crafting the perfect cover
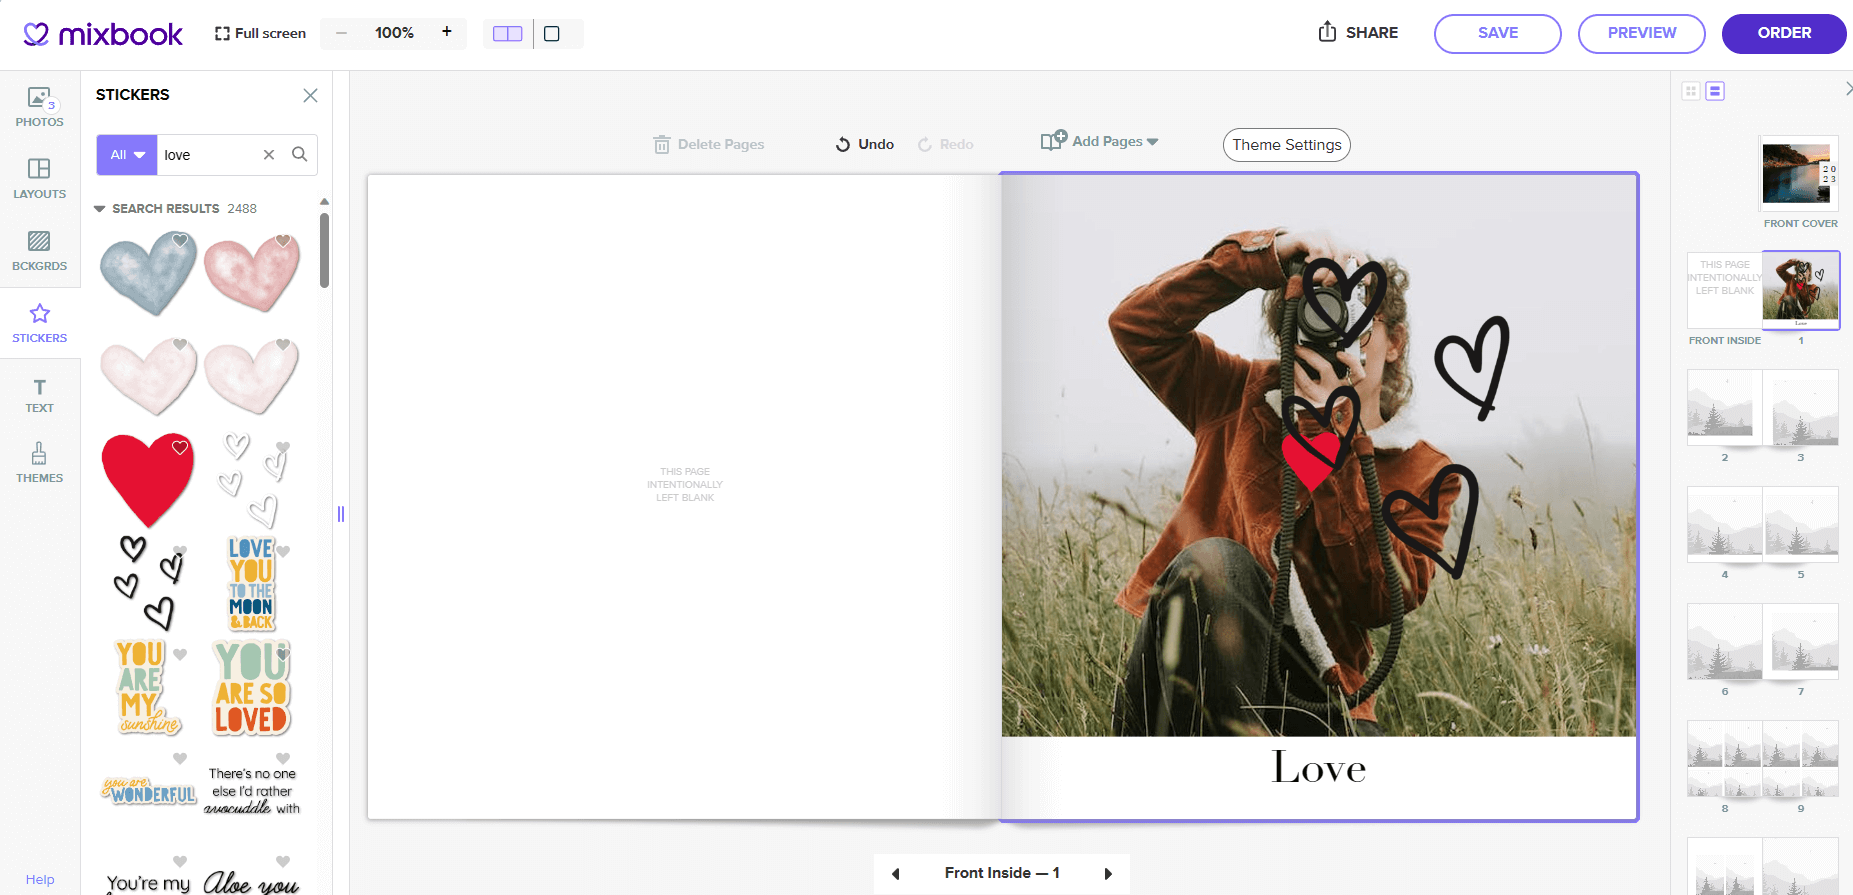
AutoCreate is a great tool, but I wanted to make some adjustments after I looked through the initial draft. I wanted to update the cover, which originally had this image:

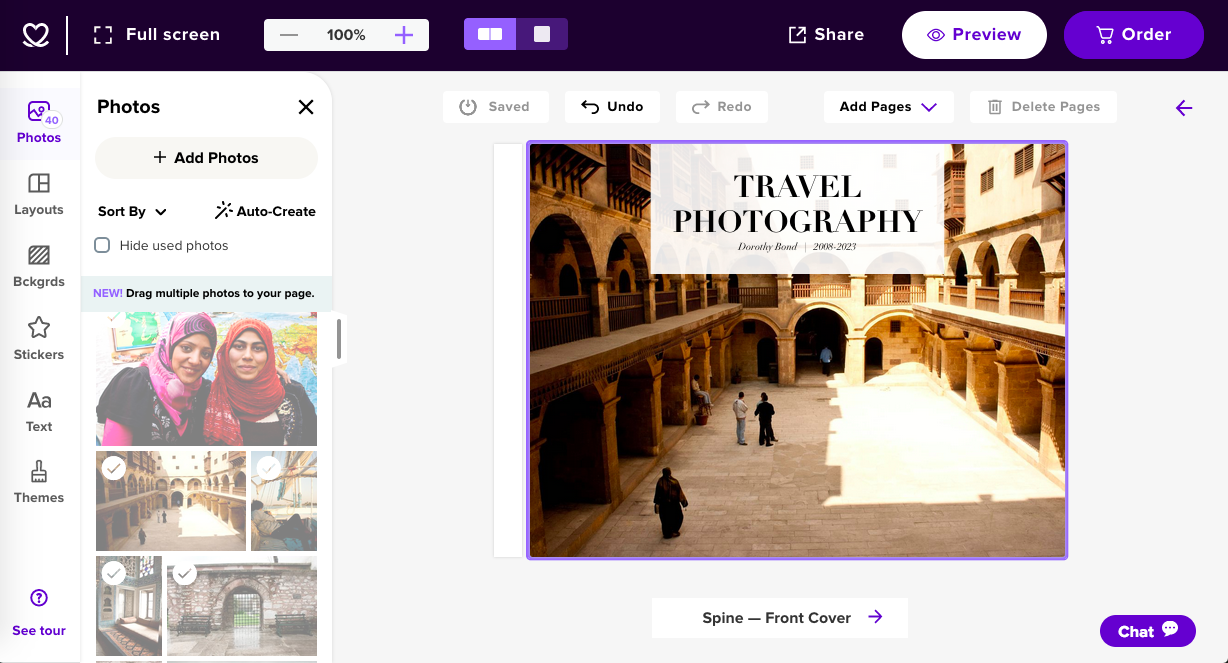
I took this photo of a mother and her daughters on the street in Cairo at their request. It's one of my favorite photos ever, but the banner at the top of the cover obstructed some of the women's faces. So, I updated it to this shot instead:

Step five: Addressing cropping & clarity issues
While AutoCreate is a powerful, tool, it can't always discern what's going on in an image. Take the original layout for one of my Istanbul pages where some of the photos are cropped poorly:

Fixing cropping and clarity issues like these is easy. I simply navigated to the "Layouts" menu on the left-hand side of my Mixbook Studio screen. I picked recommended layouts with three photos and scrolled through my options until I found one that worked well.
I picked the new layout and added captions. Here's the final result:

Step six: Adding captions & quotes
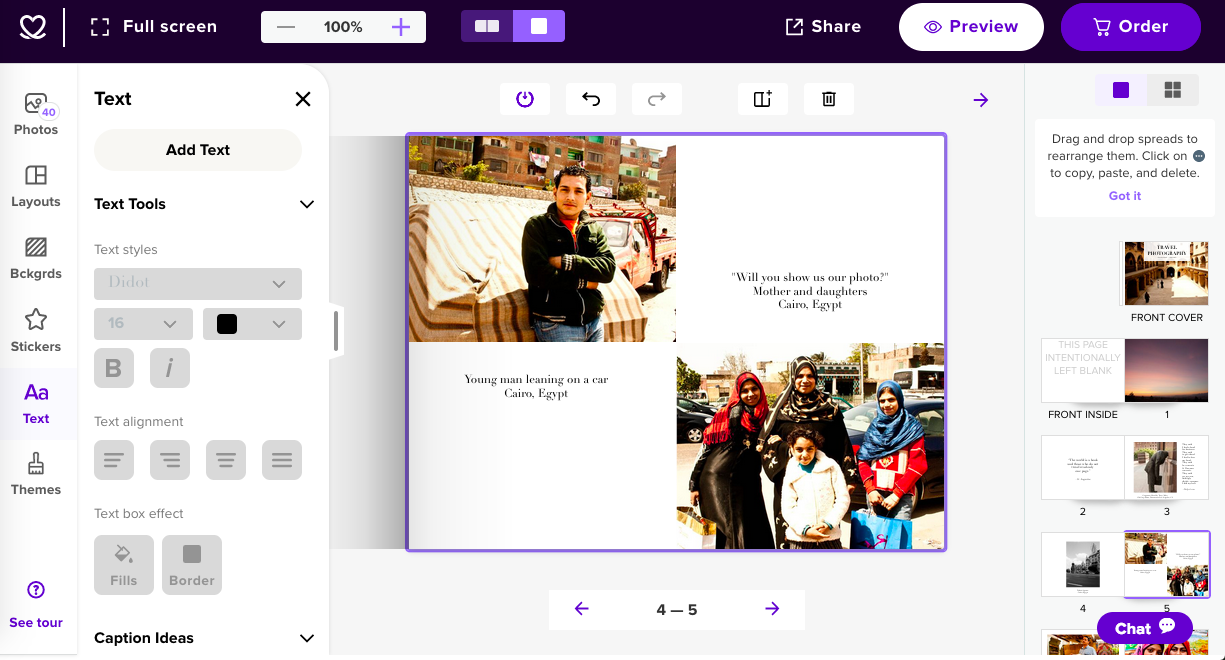
Using captions and quotes in a photography portfolio helps guide the viewer through the book and clarifies the subject matter. For this portfolio, I wanted to combine some of my favorite quotes about travel alongside helpful descriptive captions. I decided to go with basic captions for my shots, like the ones on this page:
You can combine captions and quotes on a single page too. For this featuring a public art sculpture in Downtown Los Angeles, I knew that I wanted to both credit the artist and include the poem that's inscribed on a plaque beside the statue. Here's what the page originally looked like:

To add the poem, I simply highlighted and replaced the original Brooke Shields quote with the new text. I adjusted the font size and alignment for better aesthetics. Then, I added a caption with the "Add Text" tool found under "Text" on the left-hand side of the screen. I love how the finished page turned out:

Step seven: Proofing & finalizing the design
My design was done in under an hour, and I knew I only had two more tasks: preview the book and order a copy. I opened up the "Preview" pane in full screen and scrolled through each page to ensure that the captions were correct and the photos looked great.
As I did my final review of the book, I realized that the back cover photo placed by AutoCreate didn't match the front cover well. The original had this shot of the shoreline of Lake Nicaragua:

I replaced it with this photo from a felucca boat on the Nile instead because I felt it melded better with the front cover — which was also taken in Cairo.

I made a few other adjustments as I worked my way through the book. After I'd completed the review, I knew it was time to order.
Step eight: Ordering & unboxing my photography portfolio
Ordering my photography portfolio with Mixbook was quick and easy. I navigated to the order page from Mixbook Studio and picked my cover, book size, and paper options. I went with a lay-flat book with matte finish for this portfolio so that photos spread over two pages would look great.
I was thrilled when my package from Mixbook arrived. I carefully opened the box and pulled out my photography portfolio. It looks great on my coffee table! I love that it came with a sturdy storage box so that I can put it up for safekeeping later.
Keeping my photography portfolio up to date
My photography is always evolving. I want my portfolio to evolve too. One of the biggest advantages of using Mixbook is that I can easily remove old photos and add new ones to my portfolio anytime I want. I'm looking forward to updating my portfolio every year without the hassle of creating an entirely new book.
Why not make a portfolio photo book to showcase your photography? Get started on your unique design with Mixbook today. You can finish your own portfolio in under an hour.